November 30, 2022
The ‘release-please’ in Azure DevOps Pipelines
Introduction
How does Azure Pipelines work?
A Microsoft article called “What is Azure Pipelines?” says that “Azure Pipelines automatically builds and tests code projects to make them available to others. It works with just about any language or project type. Azure Pipelines combines continuous integration (CI) and continuous delivery (CD) to test and build your code and ship it to any target.”
In light of this information, if you want to create a pipeline on Azure DevOps, this article can serve as your step-by-step guide.
What is release-please?
Release Please automates CHANGELOG generation, the creation of GitHub releases, and version bumps for your projects. When you merge the pull request once the release is ready for tagging, release-please will take these actions:
- Update the CHANGELOG.md file (if it does not exist, it will be created first) as well as other project-specific files like package.json.
- Tag the last commit with the version number.
- Create a GitHub release.
Release Please does so by parsing the git history, and looking for Conventional Commit messages. And the most important prefixes are:
- fix: which represents bug fixes, and correlates to a SemVer patch.
- feat: which represents a new feature, and correlates to a SemVer minor.
- feat!:, or fix!:, refactor!: which represents a breaking change (indicated by the !) and will result in a SemVer major.
Release Please is created by Google Cloud. So, there is no service in the marketplace in the Azure world. The integration should be performed manually in the pipeline and that is what this article is about.
How to create a pipeline in Azure Pipelines
First of all, the YAML file must be created in a branch so that we can select the related branch and the existing YAML file on Azure DevOps UI to be able to create a pipeline.
According to the method described in this article, there are 2 different YAML files. One of them extends the pipeline from a template which the other YAML file is integrated with using the release-please plugin. The reason for this action is to create a way to be able to use the same pipelines for multiple services.
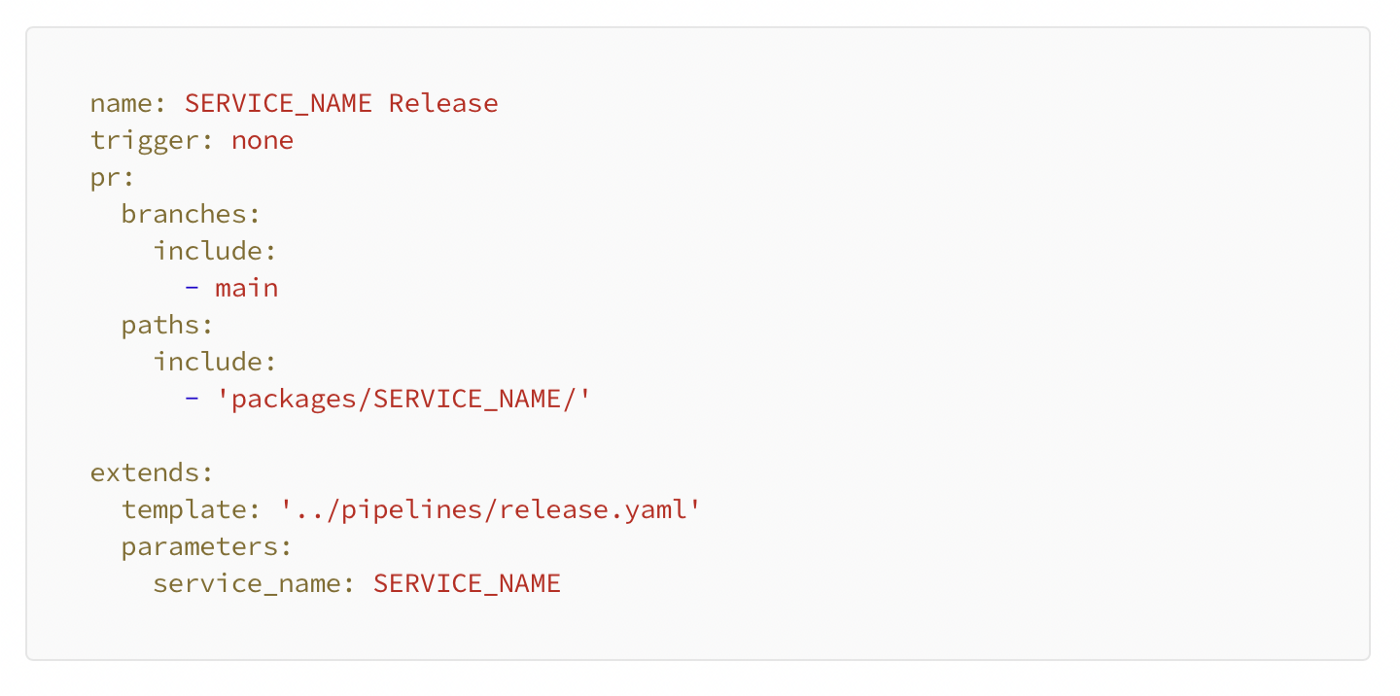
The release.yaml given below is the first YAML file and it is placed within the package files under the pipeline path specific to each package. And this first file can be referred to as the main YAML.
The other one is the real release.yaml. This pipeline is placed under the pipeline path to make it general for the other services as mentioned before. In this pipeline, release-please gets installed as an npm package and uses its CLI command to create similar to GitHub actions. This command can also be used with manifest and config files which include all the options in that command. However, in this article, it is used without a manifest file. To run this command, the GitHub token and repo URL are necessary while the other features are optional. The important features are listed below:
- — monorepo-tags: this pipeline is used for monorepo tagging, so it sets as true.
- — changelog-type: sets as default, to group by commit type and link to pull requests and commits. It can also be set as github to use the GitHub API in order to generate notes.
- — draft-pull-request: sets as true to create the pull request as a draft first.
- — release-as: specifies the version of the pull request, and here in this pipeline the version is increased manually.

The other options are explained on the source page.
How to integrate the release-please plugin
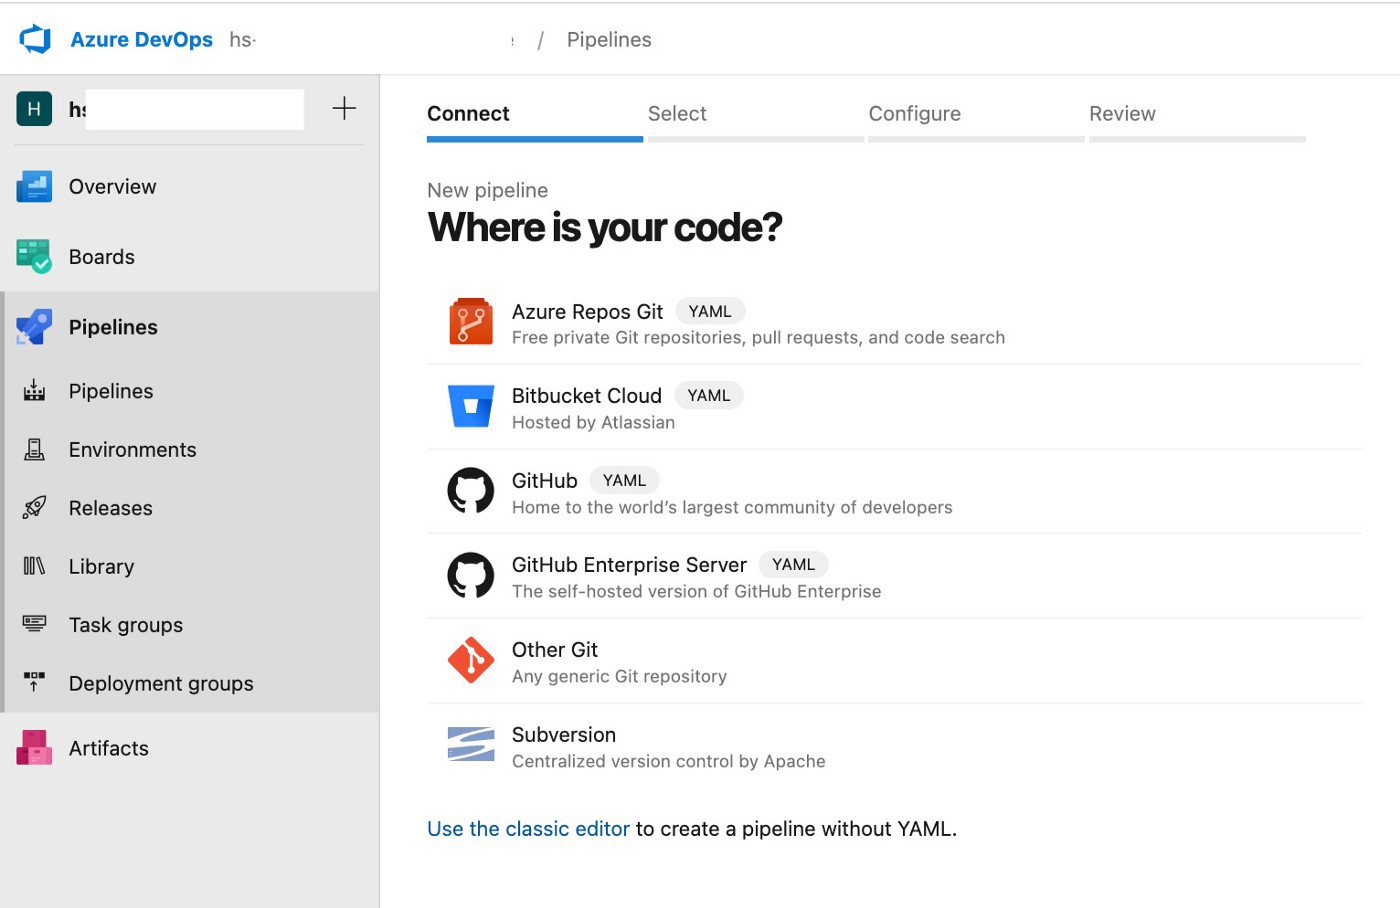
The steps you should take to integrate a release-please plugin are the same as the ones we follow while creating a pipeline in Azure DevOps. Our codes are in a GitHub repository, so this pipeline is created for GitHub.
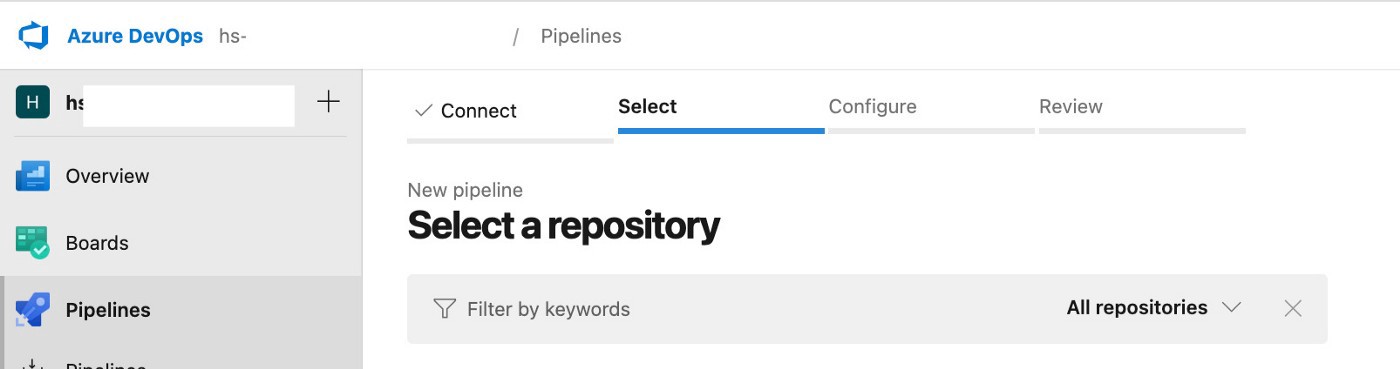
Then we select our repository as shown on the screen below.
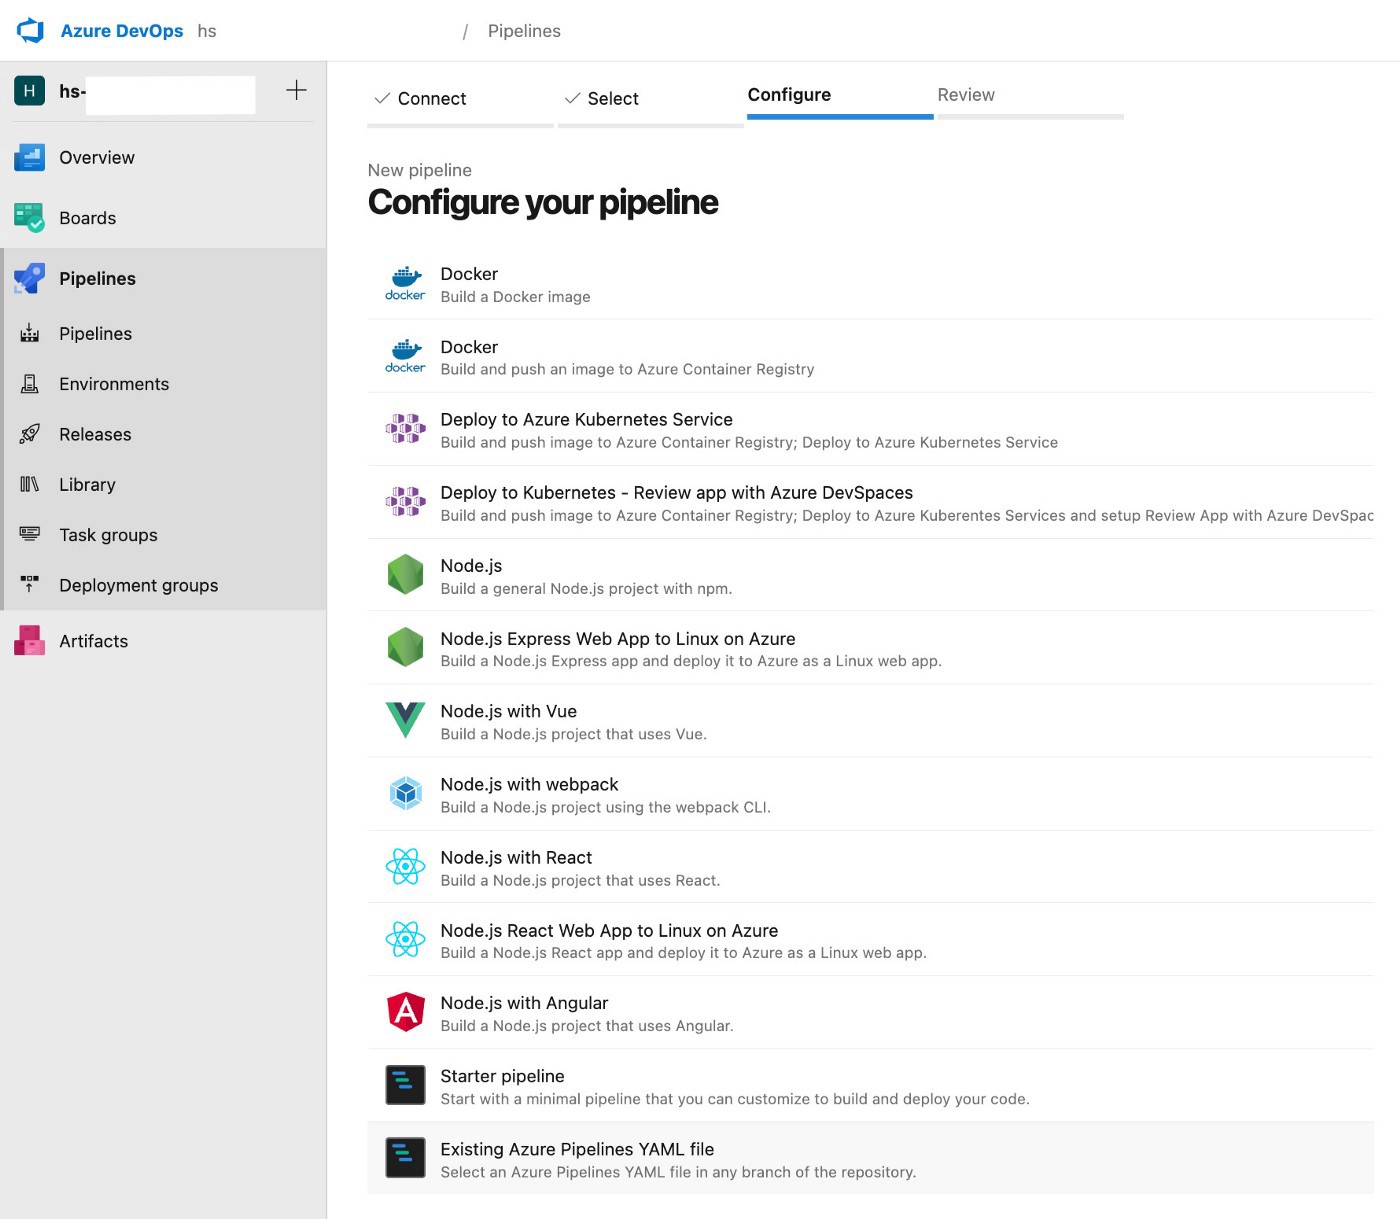
Afterward the pipeline’s YAML files are already prepared, so the pipeline should be configured from the existing YAML file on the screen below.
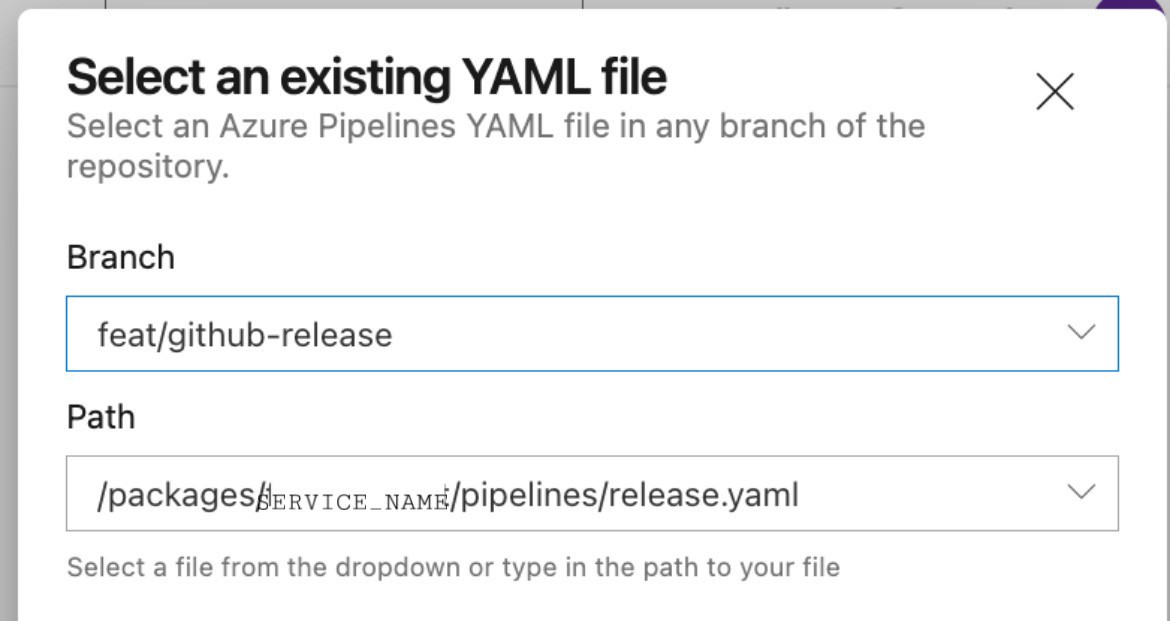
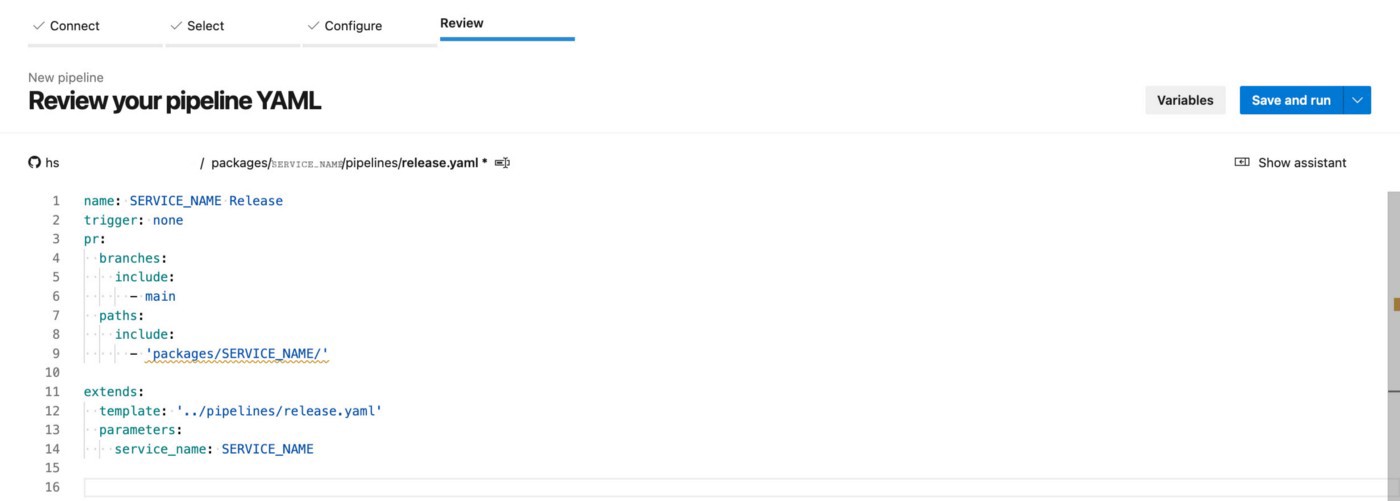
Then the release.yaml file in the packages folder should be selected as shown on the screen below. Because it is the main pipeline YAML for the related service and extends from the general release pipeline.
After reviewing the pipeline, the “Save and run” button will be available for you to click.
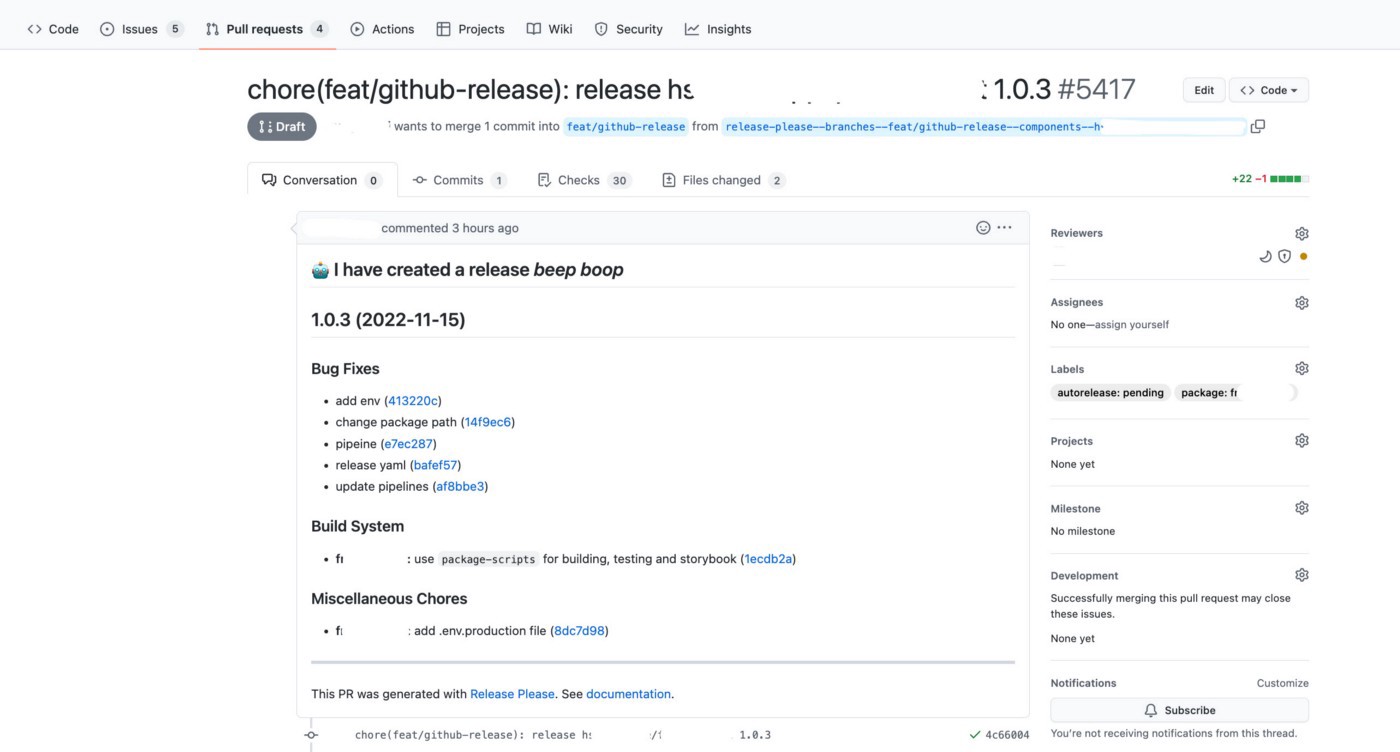
After the pipeline run, the output should look as portrayed below.
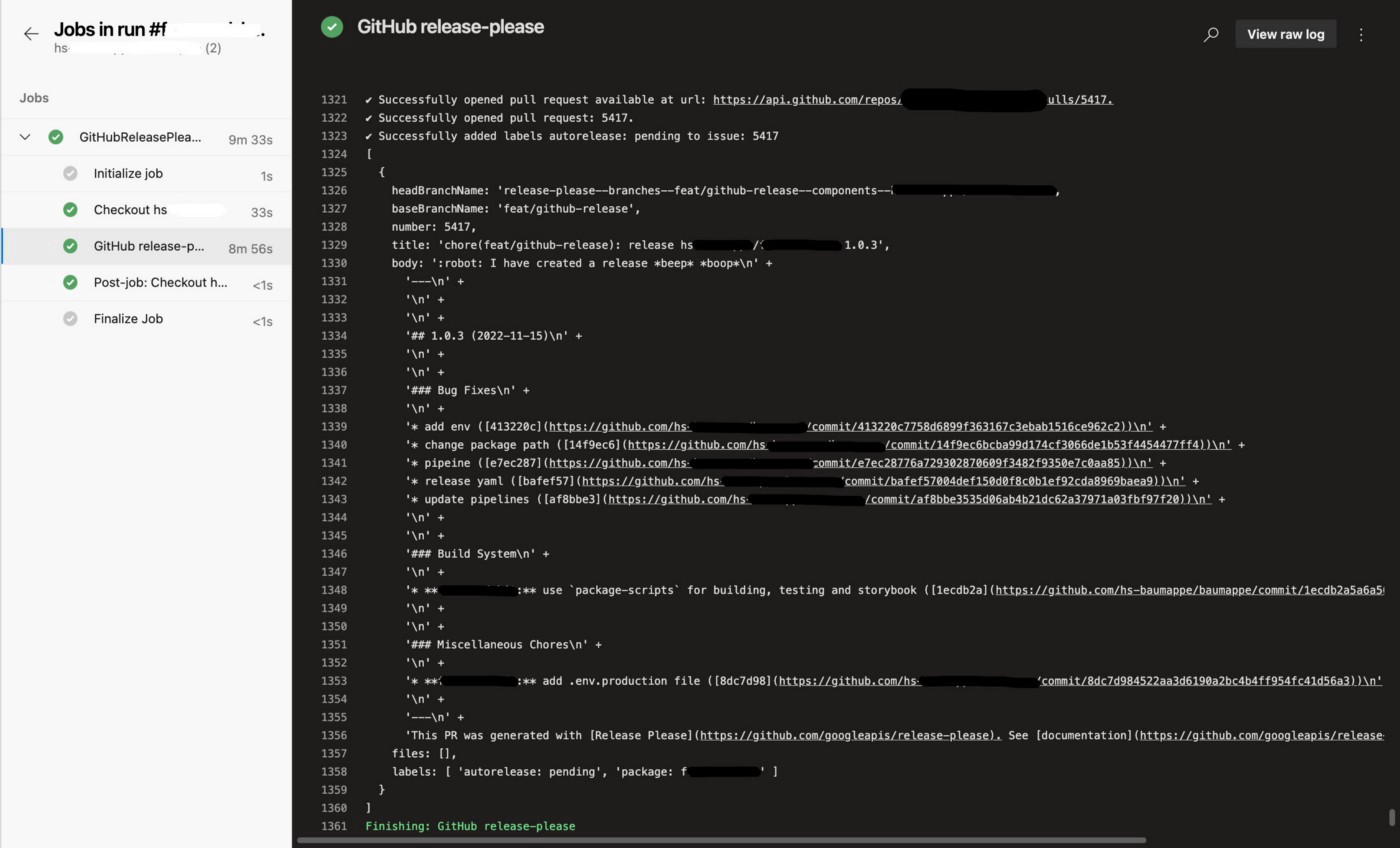
In the end, a pull request is opened without using GitHub actions :ta-da: